

I swear by the book my Aunt Purdy gave me:
The Baker in Me by Daphna Rabinovitch which has many great sweet or savoury recipes with a small section after most recipes on how you can change it up or substitution ideas for certain flavours or for allergy accommodations. At the beginning of the book, it also goes through certain skills and techniques for beginner bakers like me so we don’t mess up… as frequently.

Some other recipes I pulled off google that i’ve tried and loved:
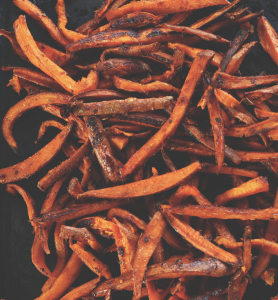
Cajun Sweet Potato Fries – Spicy Mayo Sauce not included but goes very well with it:
https://minimalistbaker.com/cajun-baked-sweet-potato-fries/
More from google:
Zucchini Pasta with Lemon Garlic Shrimp
With Downshiftology and Lisa Bryan
ZUCCHINI PASTA WITH LEMON GARLIC SHRIMP
YIELD: 4 servings TOTAL TIME: 15 minutes PREP TIME: 10 minutes COOK TIME: 5 minutes
INGREDIENTS
- 4 medium zucchini
- 1.5 lb (approx 30) raw shrimp, peeled and deveined
- 2 tbsp olive oil
- 4 garlic cloves, finely chopped
- 2 tbsp butter or ghee
- 1 lemon, juice and zest
- 1/4 cup white wine (or chicken broth)
- 1/4 cup chopped parsley
- pinch of red pepper flakes
- salt and pepper, to taste
DIRECTIONS
- Wash and cut the ends of the zucchini. Using a spiralizer, make the zucchini pasta. Then, set aside.
- Heat the oil in a large pan over medium-high heat. Add the shrimp in one flat layer and sprinkle with salt and pepper. Cook for one minute without stirring, so the bottom side gets a little crispy.
- Add the chopped garlic, then stir the shrimp for another minute or two to cook the other side. Use a large spoon or tongs to remove the shrimp to a plate.
- Add the butter, lemon juice and zest, red pepper flakes and white wine to the pan. Bring to a simmer for 2-3 minutes while stirring.
- Stir in the parsley, then add the zucchini pasta and toss for 30 seconds to warm it up. Add the shrimp back to the pan and stir for another minute. Serve immediately.
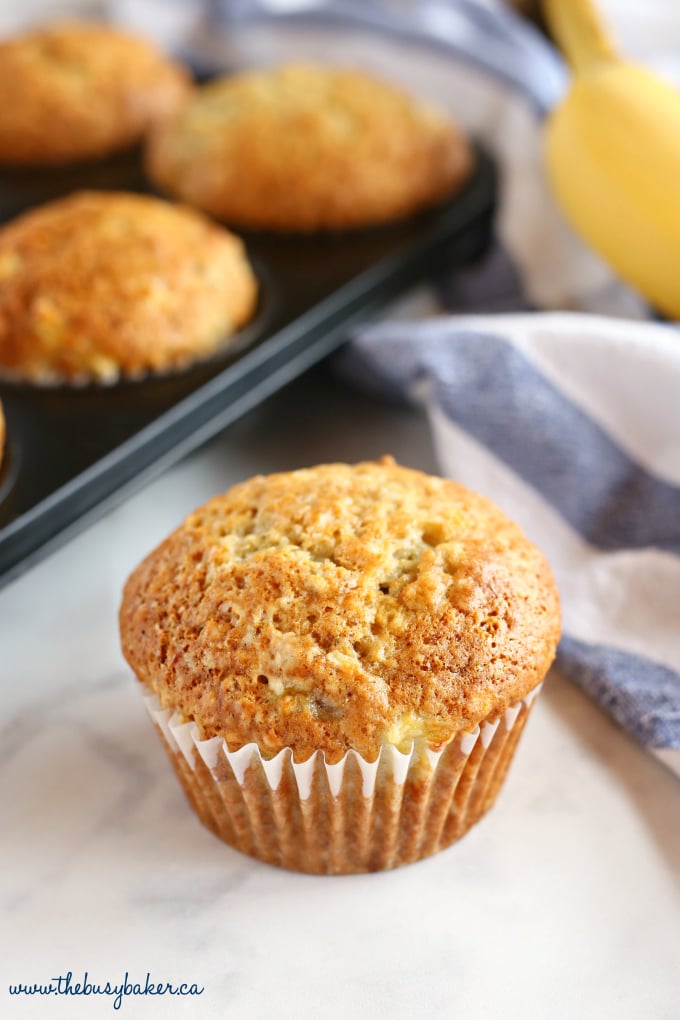
December 2, 2019 – I’ve been really into making banana bread as a study snack for finals. It also helps that I have a lot of bananas that were too ripe.
Anyways, here is a B-Bread recipe which is now my go-to after my friend Maddy introduced it to me! (credit to Chrissie Baker)
Link: https://thebusybaker.ca/best-ever-banana-muffins/
BEST EVER BANANA MUFFINS
Baking Notes
Ingredients
- 3 large ripe bananas
- 3/4 cup white sugar
- 1 egg
- 1/3 cup oil vegetable oil is best
- 1 1/2 cups all purpose flour
- 1 tsp baking soda
- 1 tsp baking powder
- 1/2 tsp salt
Instructions
-
Preheat your oven to 350 degrees Fahrenheit and line your muffin tin with 12 paper muffin cups.
-
In a large mixing bowl, mash the bananas with a fork until no large pieces remain.
-
Add the sugar, egg and oil and mix with a wooden spoon until everything is incorporated.
-
Measure the flour, baking powder, baking soda and salt into a separate mixing bowl and stir them together with a fork. Once they’re mixed together, dump the dry ingredients into the wet ingredients.
-
Using a wooden spoon, carefully mix the wet and the dry ingredients together. The danger here is over-mixing which will result in dense, flat and dry muffins. The best technique for mixing is to scoop underneath the mixture and pull up gently instead of stirring around in a circle (like you’d stir your coffee, for example). Continue mixing this way just until the dry ingredients have been incorporated. It’s fine if there are a few small streaks of flour in the batter; it’s the large pockets of flour you want to make sure are incorporated.
-
Spoon the batter into 12 lined muffin cups. Try your best to ensure you fill the cups evenly. This will ensure each of the muffins is finished baking at the same time (you don’t want some over-baked and some raw in the middle!)
-
Bake the muffins in the oven at 350 degrees for about 23 minutes (anywhere from 22-25 minutes, depending on your oven), or until they are golden brown.
-
Let them cool in the tins for about 5 minutes and then turn them out of the tins to let them cool completely on a cooling rack. Or, enjoy one warm from the oven slathered in butter.
Recipe Notes
These muffins can be stored in an airtight container for up to 4 days, although they’ve never lasted that long in our house!
You can also cut down on the sugar and add apple sauce for a healthier alternative!
The BEST Red Velvet Cake!!!
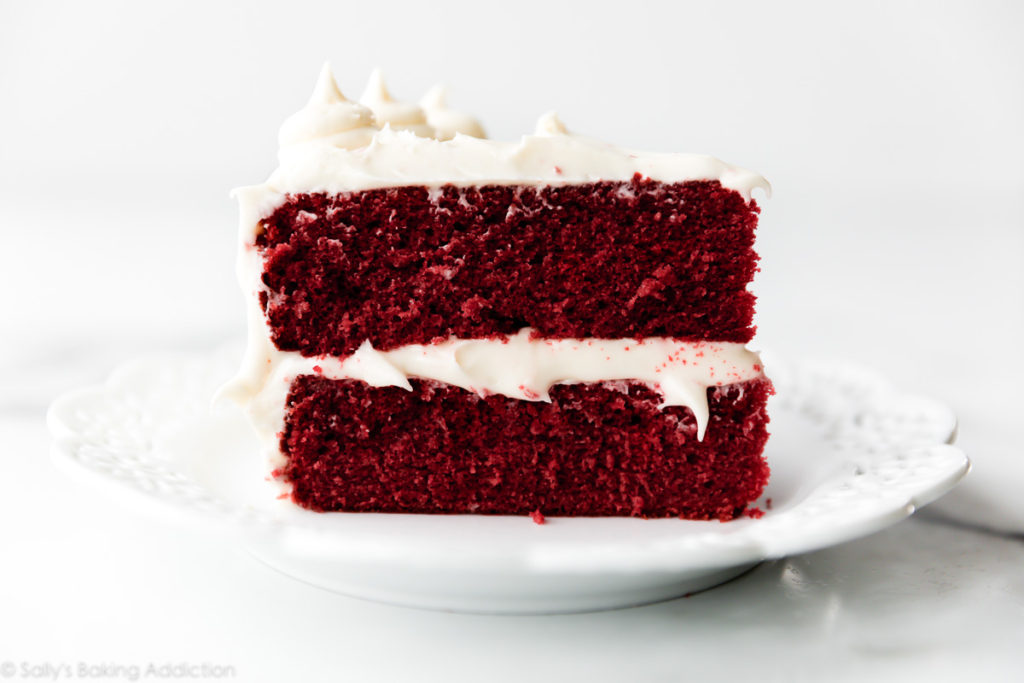
Wooow! I made this as a birthday cake, first time making a red velvet cake and one of my first couple attempts at making a cake in general. Turned out DELICIOUS AND MOIST AND DENSE. 10/10
Found the recipe from google below. It suggests using cake flour, which I didn’t have but it gives you recipe to make your own cake flour (flour and corn starch)
Credit to Sally’s Baking Addition
https://sallysbakingaddiction.com/red-velvet-layer-cake-with-cream-cheese-frosting/
How to Make a Homemade Cake Flour Substitute
Step 1: Measure 1 cup all-purpose flour. Remove 2 Tablespoons.
Step 2: Measure 2 Tablespoons cornstarch. Add to the flour. Cornstarch contains less gluten than flour, so it’s a wonderful tenderizing ingredient to help make cake flour.
Step 3: Sift together TWICE. Basically, sift into a mixing bowl once. Then run it through the sifter one more time. Sifting not only mixes the two ingredients together appropriately, it aerates the mixture so the consistency is similar to real cake flour.
Step 4: Measure 1 cup from this mixture. You’ll have about 1 cup anyway, but sometimes sifting can produce more volume since it’s adding air.